Overview
This is the second post in the Installing and Configuring Citrix XenApp 6.5 Series:
- Install and Configure Citrix XenApp Licensing
- Install and Configure Citrix XenApp 6.5 (this post)
- Configure Web Interface for Citrix XenApp 6.5
- Publishing Applications with Citrix XenApp 6.5
- Install and Configure Profile Management for Citrix XenApp 6.5
- Add Servers to a XenApp 6.5 Farm
- Configure Pass-through Authentication for Citrix XenApp 6.5
- Install and Configure Citrix Secure Gateway
Contents
This post contains the following sections:
- Install Citrix XenApp 6.5 and Web Interface Components
- Configure Citrix XenApp 6.5 Licensing
- Configure Citrix XenApp 6.5
Install Citrix XenApp 6.5 and Web Interface Components
- Log in to CTXXA01 as a Domain Administrator.
- Insert the XenApp DVD or attach the ISO file to start the installation.
- Select Install XenApp Server:

- Select Add server roles:

- Select Enterprise Edition:

- Tick the I accept the terms of this license agreement tickbox:

- Select XenApp and Web Interface (Web Interface will be configured in a future post):

- As we’re installing Web Interface on the first XenApp server, we should select XML Service IIS Integration:

- Review the prerequisites, then click Next:

- Click Install:

- Click Finish:

- Click Reboot:

- After a reboot, make sure you login with the same domain user as before, then the Citrix XenApp Server Role Manager should appear. Click Resume Install:

- Click Install:

- Click Finish once complete:


Configure Citrix XenApp 6.5 Licensing
- Click Specify Licensing under XenApp:

- Enter the name of the Citrix Licensing server (CTXLIC01), then click Test Connection. Click Next:

- With the XenApp radio button selected, click Apply:


Configure Citrix XenApp 6.5
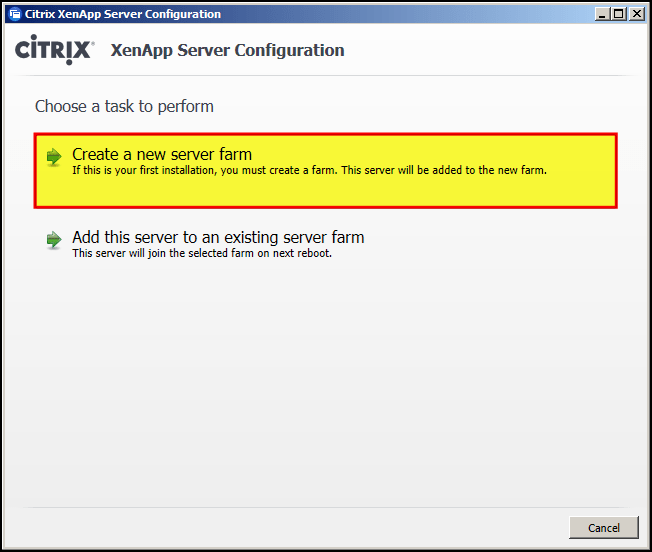
- Click Configure under XenApp:

- Select Create a new server farm:

- Enter a name for the farm (eg. CTXFarm) and the First Citrix administrator account:

- Select Existing Microsoft SQL Server database, as we have a dedicated SQL Server:

- Enter the Database server name (eg. SQL01), the Database name (eg. citrix), and select how you will authenticate:

- Enter your credentials to authenticate, then click Test Connection:

- Select Allow shadowing at this point, else you will not be able to change this at a later date:

- Enter a Zone name (eg. Bristol) – I think of these like Sites in Active Directory (AD):

- We cannot change the XML Service port here, as we installed XML Service IIS Integration, which shares port 80 with IIS:

- We’ll leave this blank for now:

- Select which users will become members of the Remote Desktop Users group:

- Review the summary information, then click Apply:

- Once installation is complete, click Finish:

- Click Reboot:

- After a reboot (again, login with the same domain account as before) this Citrix Receiver window may appear. If so, select I will enter the URL later: